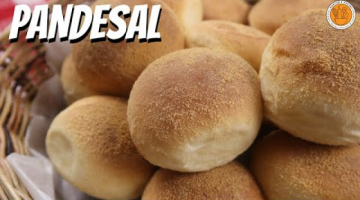
PANDESAL RECIPE | How to Make the Best Traditional Pandesal | Homemade Pandesal
PANDESAL RECIPE | How to Make the Best Traditional Pandesal | Homemade Pandesal | Mortar and Pastry | Bakery Pandesal | Panaderia | Soft Pandesal
PANDESAL (makes 18 pieces):
Ingredients:
- 1/2 cup lukewarm water
- 2 tbsp powdered milk __ 8
- 1 cup bread flour __ 10
- 1 1/2 cups all purpose flour + 1 cup for kneading __ 22
- 2 tsp instant dry yeast __ 6
- 1/2 cup lukewarm milk __ 10
- 1 tsp salt __ 1
- 1/4 cup melted margarine, cooled __ 12
- 1/4 cup + 1 tbsp sugar __ 4
- Fine bread crumbs for dredging __ 10
- 1 medium egg __ 7
Total = 90 pesos / makes 18pcs
FLOUR
I used a combination of all purpose flour and bread flour just to have the right balance of softness and chew. You can also use either. Using pure APF makes a softer pandesal and chewier if using bread flour. Whatever flour you used with the higher ratio, that's the flour you will use for kneading. In this case, I used higher ratio of APF so I used it for kneading as well.
FAT
For this recipe I used melted margarine. I find it tastier than butter for plain breads like pandesal. You can absolutely use butter as well. Just make sure it is cooled before mixing with the flour and yeast.
TEMPERATURE OF INGREDIENTS
Use lukewarm milk and water. You can scald them (just before simmering) then cool slightly just until lukewarm. You can check the right temperature by dipping your pinky finger and it must feel like body temp.
MILK
I used fresh milk which I warmed in the microwave, same with water. You can also use full cream milk and evaporated milk. When using evap, use 1:1 ratio of evap and water as substitute for fresh milk. The recipe calls for 1/2 cup milk so you can use 1/4 cup evap + 1/4 cup water.
YEAST
I used INSTANT dry yeast for this recipe. For this type of yeast, you can mix it directly with the flour mixture, avoiding direct contact with salt as it can kill your yeast. I just dissolved it in the warm water so it incorporates easily with the dough. However, if you're using ACTIVE dry yeast, it really needs to be dissolved first in lukewarm water then set aside for about 5 minutes until frothy then it's ready to use. Make sure your water is not too cold (your yeast won't be activated) or too hot (your yeast may die and not work).
SUGAR
You can use washed sugar or white sugar
POWDERED MILK
You can use skimmed milk powder or regular powdered milk ( I used bear brand)
BREAD CRUMBS
I used fine bread crumbs (Marby's and brand) available sa mga supermarket nearby sugars and cooking oils. If you can't find one, you can toast some plain stale bread then crush them finely just like what was shown in the video.
MALUNGGAY FLAKES
If you're making malunggay pandesal, you can make your own malunggay flakes at home. Wash and dry malunggay leaves, and dry them in the oven at 120C for 10-15 minutes or just until completely dried. Make sure to cool them completely to be crunchier and easier to crush into flakes. Remove small stems if there is any. You can add dried malunggay flakes directly to the flour mixture if you're making malunggay pandesal. Just make sure not to add to much as it can make the dough a bit bitter. You can also mix some with the bread crumbs that will be used for dredging.
BAKING TRAY
You can arrange them directly in a baking tray leaving enough space for them to rise. No need to grease the tray or add parchment paper, they won't stick with the help of bread crumbs.
WEIGHING
This is completely optional but this method is helpful to make even and uniformly sized pandesal. I always opt to do this method to have equal sizes. You can weigh 25g to 50g depending on how big you want them to be. Keep in ind that they will still proof and become larger also will rise a bit more in the oven.
DREDGING
If the bread crumbs doesn't stick well to the dough, you can moisten each dough with a bit of water to help the crumbs adhere and coat them well.
BAKING TIME
Baking time may vary depending on how toasted you want them to be. Usually around 15-18 minutes they are golden and done. I prefer them toasted so I bake them usually about 20 minutes
KNEADING
Measure 1 cup extra flour for kneading. Use it to flour your work surface and the dough to avoid sticking too much. It's a sticky wet dough at first so we could adjust adding flour and not add it all at once at the beginning to prevent it from drying. You can consume the full cup for kneading. If you consumed all of it, don't be tempted to add more flour if it's still a bit sticky to avoid dry and dense pandesal. On the other hand, it's perfectly fine if there's more flour remaining from the cup. I prefer kneading over a wooden surface as wood generates a good amount of heat from the kneading which helps warming up our dough, but any clean surface will do.
STORAGE & SHELF LIFE
Store them in a dry tightly closed container. They can be consumed maximum of 3 days after baking. Adding a tablespoon of bread improver to the flour mixture makes it softer for days.
 Recipes-US
